title: "添加删除按钮" post_status: publish comment_status: open taxonomy: category: - gutenberg-docs post_tag: - Data Basics - How To Guides - Repos
添加删除按钮
在上一章节中,我们实现了创建新页面的功能, 现在我们将为应用添加删除功能。
以下是我们即将实现的效果预览:
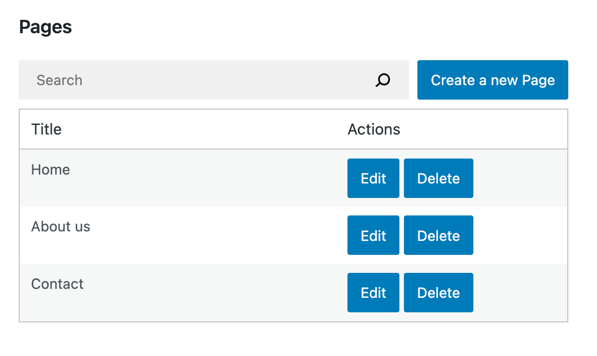
Step 1: Add a Delete button
Let's start by creating the DeletePageButton component and updating the user interface of our PagesList component:
import { Button } from '@wordpress/components';
import { decodeEntities } from '@wordpress/html-entities';

const DeletePageButton = () => (
    <Button variant="primary">
        Delete
    </Button>
)

function PagesList( { hasResolved, pages } ) {
    if ( ! hasResolved ) {
        return <Spinner />;
    }
    if ( ! pages?.length ) {
        return <div>No results</div>;
    }

    return (
        <table className="wp-list-table widefat fixed striped table-view-list">
            <thead>
                <tr>
                    <td>Title</td>
                    <td style={{width: 190}}>Actions</td>
                </tr>
            </thead>
            <tbody>
                { pages?.map( ( page ) => (
                    <tr key={page.id}>
                        <td>{ decodeEntities( page.title.rendered ) }</td>
                        <td>
                            <div className="form-buttons">
                                <PageEditButton pageId={ page.id } />
                                {/* ↓ This is the only change in the PagesList component */}
                                <DeletePageButton pageId={ page.id }/>
                            </div>
                        </td>
                    </tr>
                ) ) }
            </tbody>
        </table>
    );
}
This is what the PagesList should look like now:
步骤 2:将按钮连接到删除操作
在 Gutenberg 数据系统中,我们使用 deleteEntityRecord 操作从 WordPress REST API 中删除实体记录。该操作会发送请求、处理结果,并更新 Redux 状态中的缓存数据。
以下是如何在浏览器开发者工具中尝试删除实体记录的方法:
// 我们需要一个有效的页面 ID 来调用 deleteEntityRecord,所以先使用 getEntityRecords 获取第一个可用的页面 ID。
const pageId = wp.data.select( 'core' ).getEntityRecords( 'postType', 'page' )[0].id;

// 现在删除该页面:
const promise = wp.data.dispatch( 'core' ).deleteEntityRecord( 'postType', 'page', pageId );

// 当 API 请求成功或失败时,promise 会被 resolve 或 reject。
REST API 请求完成后,你会注意到列表中有一个页面消失了。这是因为该列表是由 useSelect() 钩子和 select( coreDataStore ).getEntityRecords( 'postType', 'page' ) 选择器填充的。每当底层数据发生变化时,列表都会用新数据重新渲染。这非常方便!
让我们在点击 DeletePageButton 时派发该操作:
const DeletePageButton = ({ pageId }) => {
    const { deleteEntityRecord } = useDispatch( coreDataStore );
    const handleDelete = () => deleteEntityRecord( 'postType', 'page', pageId );
    return (
        <Button variant="primary" onClick={ handleDelete }>
            Delete
        </Button>
    );
}
Step 3: Add visual feedback
It may take a few moments for the REST API request to finish after clicking the Delete button. Let's communicate that with a <Spinner /> component similarly to what we did in the previous parts of this tutorial.
We'll need the isDeletingEntityRecord selector for that. It is similar to the isSavingEntityRecord selector we've already seen in part 3: it returns true or false and never issues any HTTP requests:
const DeletePageButton = ({ pageId }) => {
    // ...
    const { isDeleting } = useSelect(
        select => ({
            isDeleting: select( coreDataStore ).isDeletingEntityRecord( 'postType', 'page', pageId ),
        }),
        [ pageId ]
    )
    return (
        <Button variant="primary" onClick={ handleDelete } disabled={ isDeleting }>
            { isDeleting ? (
                <>
                    <Spinner />
                    Deleting...
                </>
            ) : 'Delete' }
        </Button>
    );
}
Here's what it looks like in action:
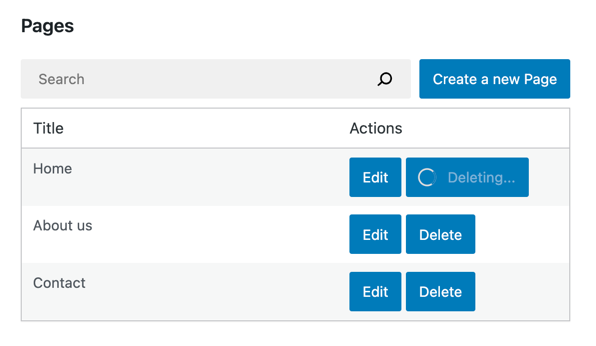
Step 4: Handle errors
We optimistically assumed that a delete operation would always succeed. Unfortunately, under the hood, it is a REST API request that can fail in many ways:
- The website can be down.
- The delete request may be invalid.
- The page could have been deleted by someone else in the meantime.
To tell the user when any of these errors happen, we need to extract the error information using the getLastEntityDeleteError selector:
// Replace 9 with an actual page ID
wp.data.select( 'core' ).getLastEntityDeleteError( 'postType', 'page', 9 )
Here's how we can apply it in DeletePageButton:
import { useEffect } from 'react';
const DeletePageButton = ({ pageId }) => {
    // ...
    const { error, /* ... */ } = useSelect(
        select => ( {
            error: select( coreDataStore ).getLastEntityDeleteError( 'postType', 'page', pageId ),
            // ...
        } ),
        [pageId]
    );
    useEffect( () => {
        if ( error ) {
            // Display the error
        }
    }, [error] )

    // ...
}
The error object comes from the @wordpress/api-fetch and contains information about the error. It has the following properties:
message– a human-readable error message such asInvalid post ID.code– a string-based error code such asrest_post_invalid_id. To learn about all possible error codes you'd need to refer to the/v2/pagesendpoint's source code.data(optional) – error details, contains thecodeproperty containing the HTTP response code for the failed request.
There are many ways to turn that object into an error message, but in this tutorial, we will display the error.message.
WordPress has an established pattern of displaying status information using the Snackbar component. Here's what it looks like in the Widgets editor:
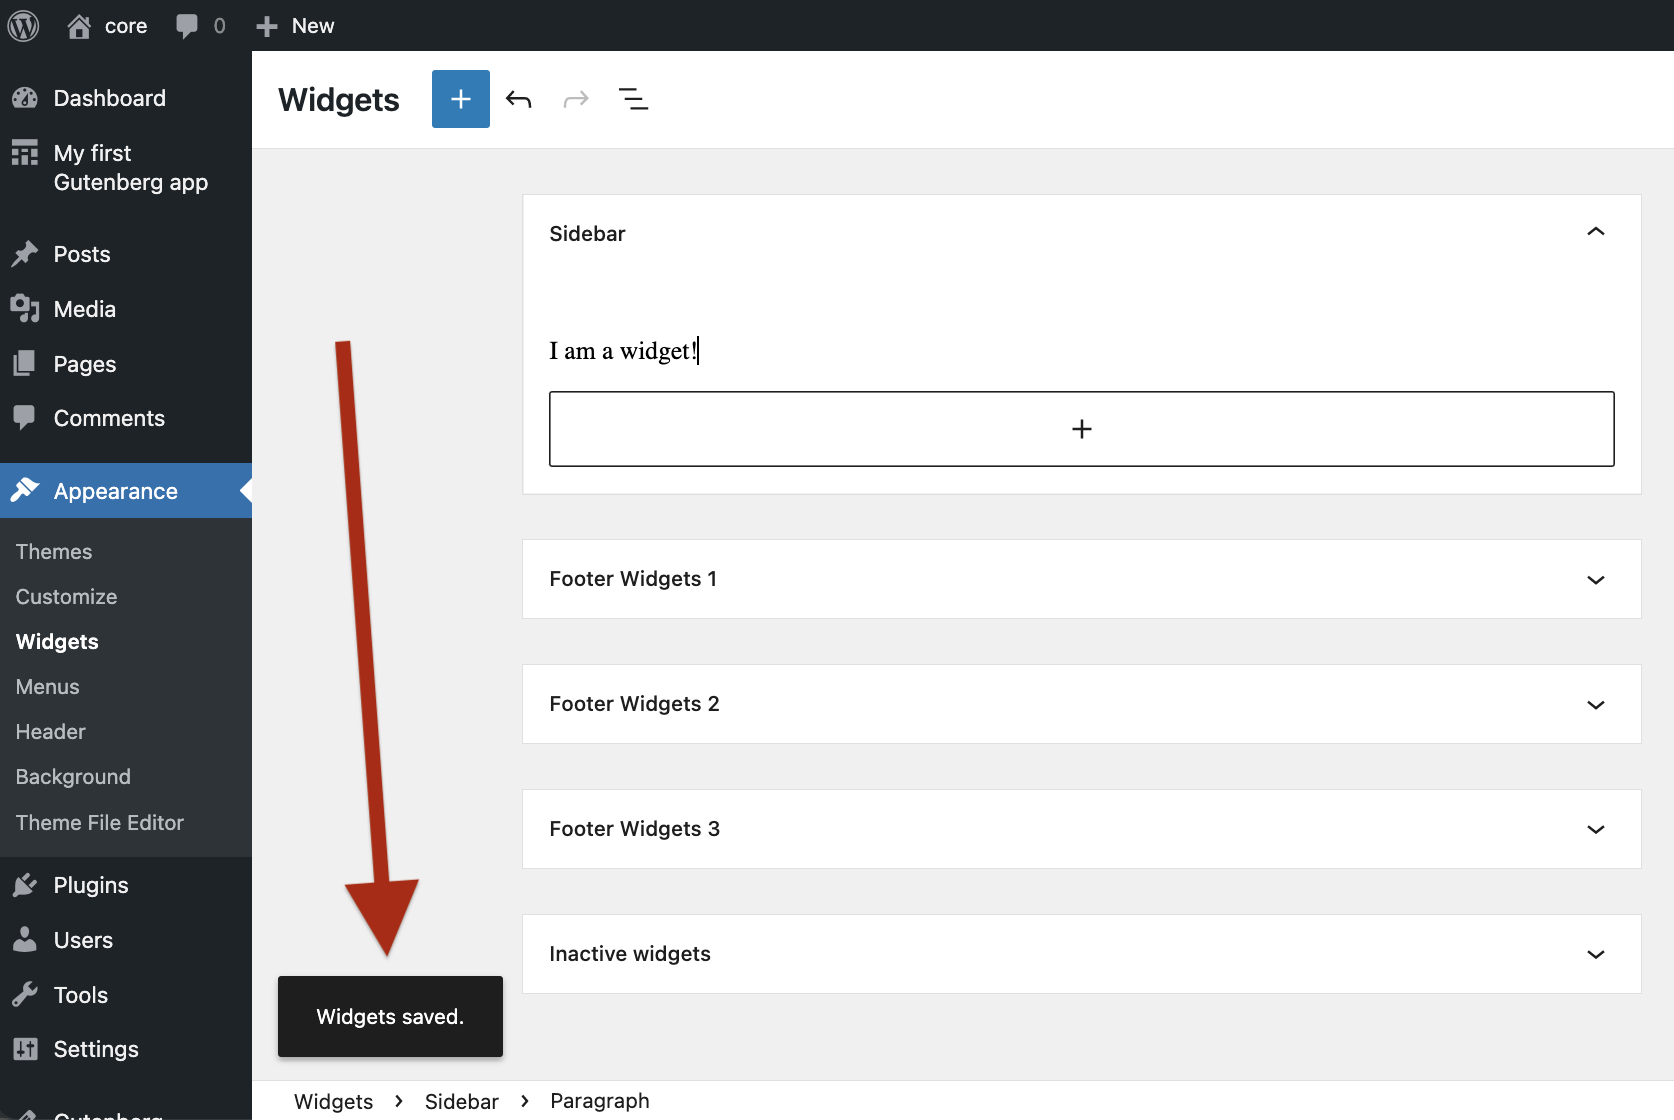
Let's use the same type of notifications in our plugin! There are two parts to this:
- Displaying notifications
- Dispatching notifications
显示通知
我们的应用目前只知道如何显示页面,但还不懂如何显示通知。让我们来教它!
WordPress 很贴心地为我们提供了渲染通知所需的所有 React 组件。其中有一个名为 Snackbar 的组件,它代表单个通知:

不过,我们不会直接使用 Snackbar。我们将使用 @wordpress/notices 中的 SnackbarNotices,它能够通过流畅的动画显示多个通知,并在几秒钟后自动隐藏它们。事实上,WordPress 在小工具编辑器和其他 wp-admin 页面中使用的也是同一个组件!
让我们创建自己的 Notifications 组件:
import { SnackbarNotices } from '@wordpress/notices';

function Notifications() {
    return <SnackbarNotices className="notifications__snackbar" />;
}
基本结构已经就位。SnackbarNotices 会自动从通知存储中读取数据,所以你只需要在应用中渲染它一次:
function MyFirstApp() {
    // ...
    return (
        <div>
            {/* ... */}
            <Notifications />
        </div>
    );
}
本教程主要关注页面管理,不会详细讨论上述代码片段。如果你对 @wordpress/notices 的细节感兴趣,手册页面是一个很好的起点。
现在我们已经准备好告知用户可能发生的任何错误了。
Dispatching notifications
With the SnackbarNotices component in place, we're ready to dispatch some notifications! Here's how:
import { useEffect } from 'react';
import { store as noticesStore } from '@wordpress/notices';
function DeletePageButton( { pageId } ) {
    const { createSuccessNotice, createErrorNotice } = useDispatch( noticesStore );
    // useSelect returns a list of selectors if you pass the store handle
    // instead of a callback:
    const { getLastEntityDeleteError } = useSelect( coreDataStore )
    const handleDelete = async () => {
        const success = await deleteEntityRecord( 'postType', 'page', pageId);
        if ( success ) {
            // Tell the user the operation succeeded:
            createSuccessNotice( "The page was deleted!", {
                type: 'snackbar',
            } );
        } else {
            // We use the selector directly to get the fresh error *after* the deleteEntityRecord
            // have failed.
            const lastError = getLastEntityDeleteError( 'postType', 'page', pageId );
            const message = ( lastError?.message || 'There was an error.' ) + ' Please refresh the page and try again.'
            // Tell the user how exactly the operation has failed:
            createErrorNotice( message, {
                type: 'snackbar',
            } );
        }
    }
    // ...
}
Great! DeletePageButton is now fully aware of errors. Let's see that error message in action. We'll trigger an invalid delete and let it fail. One way to do this is to multiply the pageId by a large number:
function DeletePageButton( { pageId, onCancel, onSaveFinished } ) {
    pageId = pageId * 1000;
    // ...
}
Once you refresh the page and click any Delete button, you should see the following error message:
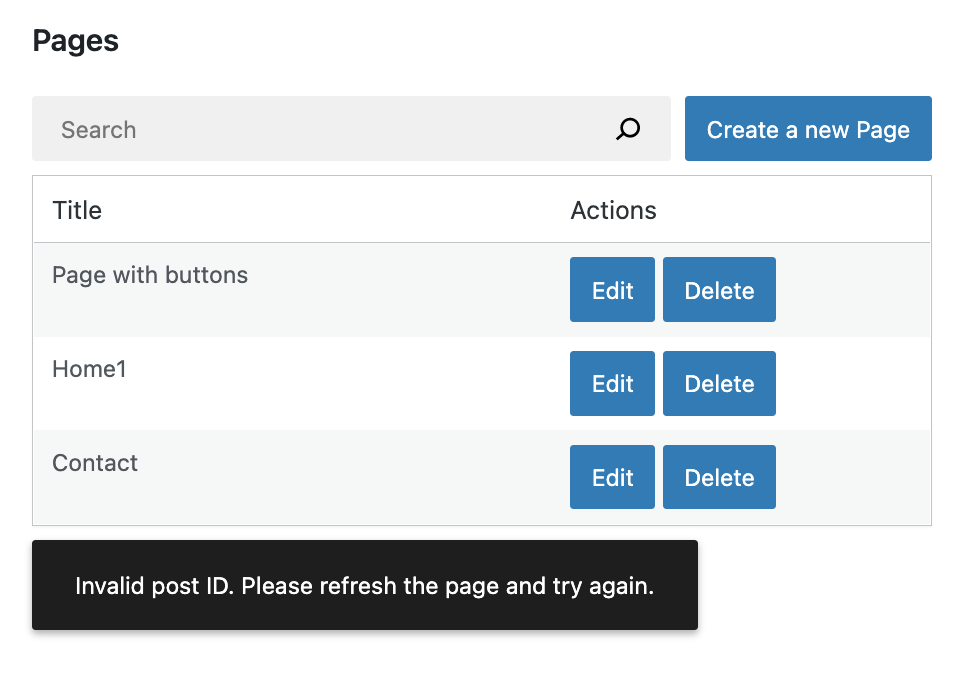
Fantastic! We can now remove the pageId = pageId * 1000; line.
Let's now try actually deleting a page. Here's what you should see after refreshing your browser and clicking the Delete button:
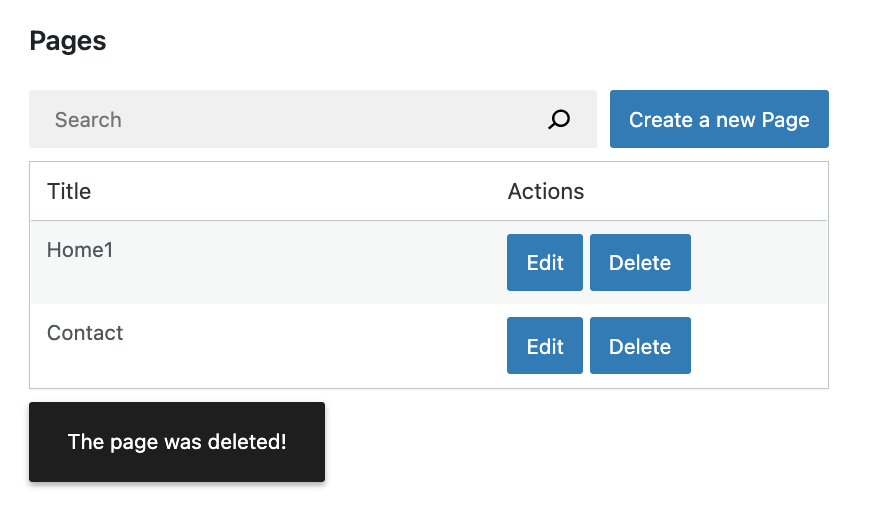
And that's it!
整合所有组件
所有组件都已就位,太棒了!以下是我们在本章中做出的所有更改:
import { useState, useEffect } from 'react';
import { useSelect, useDispatch } from '@wordpress/data';
import { Button, Modal, TextControl } from '@wordpress/components';

function MyFirstApp() {
    const [searchTerm, setSearchTerm] = useState( '' );
    const { pages, hasResolved } = useSelect(
        ( select ) => {
            const query = {};
            if ( searchTerm ) {
                query.search = searchTerm;
            }
            const selectorArgs = ['postType', 'page', query];
            const pages = select( coreDataStore ).getEntityRecords( ...selectorArgs );
            return {
                pages,
                hasResolved: select( coreDataStore ).hasFinishedResolution(
                    'getEntityRecords',
                    selectorArgs,
                ),
            };
        },
        [searchTerm],
    );

    return (
        <div>
            <div className="list-controls">
                <SearchControl onChange={ setSearchTerm } value={ searchTerm }/>
                <PageCreateButton/>
            </div>
            <PagesList hasResolved={ hasResolved } pages={ pages }/>
            <Notifications />
        </div>
    );
}

function Notifications() {
    return <SnackbarNotices className="notifications__snackbar" />;
}

function PagesList( { hasResolved, pages } ) {
    if ( !hasResolved ) {
        return <Spinner/>;
    }
    if ( !pages?.length ) {
        return <div>No results</div>;
    }

    return (
        <table className="wp-list-table widefat fixed striped table-view-list">
            <thead>
                <tr>
                    <td>Title</td>
                    <td style={ { width: 190 } }>Actions</td>
                </tr>
            </thead>
            <tbody>
                { pages?.map( ( page ) => (
                    <tr key={ page.id }>
                        <td>{ page.title.rendered }</td>
                        <td>
                            <div className="form-buttons">
                                <PageEditButton pageId={ page.id }/>
                                <DeletePageButton pageId={ page.id }/>
                            </div>
                        </td>
                    </tr>
                ) ) }
            </tbody>
        </table>
    );
}
function DeletePageButton( { pageId } ) { const { createSuccessNotice, createErrorNotice } = useDispatch( noticesStore ); // useSelect returns a list of selectors if you pass the store handle // instead of a callback: const { getLastEntityDeleteError } = useSelect( coreDataStore ) const handleDelete = async () => { const success = await deleteEntityRecord( 'postType', 'page', pageId); if ( success ) { // Tell the user the operation succeeded: createSuccessNotice( "The page was deleted!", { type: 'snackbar', } ); } else { // We use the selector directly to get the error at this point in time. // Imagine we fetched the error like this: // const { lastError } = useSelect( function() { / ... / } ); // Then, lastError would be null inside of handleDelete. // Why? Because we'd refer to the version of it that was computed // before the handleDelete was even called. const lastError = getLastEntityDeleteError( 'postType', 'page', pageId ); const message = ( lastError?.message || 'There was an error.' ) + ' Please refresh the page and try again.' // Tell the user how exactly the operation have failed: createErrorNotice( message, { type: 'snackbar', } ); } }
const { deleteEntityRecord } = useDispatch( coreDataStore );
const { isDeleting } = useSelect(
    select => ( {
        isDeleting: select( coreDataStore ).isDeletingEntityRecord( 'postType', 'page', pageId ),
    } ),
    [ pageId ]
);

return (
    <Button variant="primary" onClick={ handleDelete } disabled={ isDeleting }>
        { isDeleting ? (
            <>
                <Spinner />
                Deleting...

        ) : 'Delete' }
    </Button>
);
} ```